A raised bed is a fantastic addition to any garden, no matter how big or small.
Yet the thought of building your own raised bed is something most garden owners steer clear of. Instead, many would prefer to pay for a landscape professional to tackle the job.
We want to change that! There is no reason, with a bit of common sense and guidance, that you can’t do this job yourself!
This guide will walk you through the simple steps of building your own raised bed. From choosing the right location, buying the appropriate materials and planting your first seeds.
Why Build a Raised Bed?
First let’s cover why building a raised bed is something you should even consider.
- Improved Drainage: Elevated soil promotes better drainage, preventing waterlogging and root rot.
- Warmer Soil: Raised beds warm up faster in spring, allowing for earlier planting.
- Enhanced Soil Quality: You can fill raised beds with high-quality soil, providing optimal growing conditions for your plants.
- Pest and Weed Control: It is easier to control weed growth as well as reduce pests.
- Accessibility: Raised beds are easier to access, making gardening more comfortable, especially for those with mobility issues.
- Aesthetic: They add visual appeal to your garden, adding different dimensions, shapes, elevations and structure.
Step-by-Step Guide to Building a Raised Bed
1. Choose a Location:
Clearly this needs some thought and we’d recommend this is something you plan out before starting the project.
And creating a garden design needn’t cost the earth or even require a landscape professional. A pen and paper is all you need to sketch out some of the different spaces in your garden.
Consider the following;
- Sunlight: Select a spot that receives at least 6-8 hours of sunlight daily.
- Level Ground: Ensure the ground is relatively level to simplify construction. Of course you can build a raised bed anywhere. But this being a beginner’s guide, let’s start with somewhere flat for now.
- Accessibility: Choose a location that’s easy to reach for watering, weeding, and harvesting.
2. Plan the Size and Shape:
Whilst we celebrate and encourage creativity in garden designs, for your first raised bed we’d recommend starting with something simple. Straight edges and right angles are the way to go.
- Consider Your Needs: The size of your raised bed will depend on your gardening goals. Smaller beds are suitable for herbs and vegetables, while larger beds can accommodate a variety of plants.
- Popular Shapes: Rectangular, square, and circular beds are common choices.
3. Gather Your Materials:
A lot of the materials below you’ll likely already have at home. We’d suggest getting everything out and ready so there’s no stopping and starting.
Oh, and if you have a battery powered drill, remember to charge it up before you start 😉.
- Wood: Treated timber, cedar, or recycled plastic are popular choices.
- Screws or Nails: For securing the wood pieces together.
- Angle brackets: Using these makes it much easier to connect the wood at each angle. It also makes for a more structurally stable frame.
- Level: To ensure the bed is level.
- Drill: For drilling pilot holes before screwing.
- Saw: For cutting the wood to size.
- Soil: High-quality potting mix or a blend of compost, topsoil, and sand.
- Pencil: To mark the wood for cuts and holes for screws
- Measuring tape: To make sure each of the opposing wooden slats are equal in length.
4. Assemble the Frame:
Now we move onto the construction of the bed.
- Cut the Wood: Cut the wood pieces to the desired size using a saw.
- Assemble the Corners: Connect the vertical pieces to the horizontal pieces using screws or nails. It is here the angle brackets will come in handy.
- Level the Frame: Place the assembled frame on the chosen location and level it using a level. Adjust the legs or feet as needed.
5. Line the Bed:
While not always necessary, we’d definitely recommend lining the bed with some landscape fabric. Not only is this very cheap, but following this step is what prevents weed growth.
Once you’ve laid the lining, staple or pin it to the inside of the bed.
6. Fill the Bed with Soil:
Fill the bed with a high-quality potting mix or a blend of compost, topsoil, and sand. When doing so, avoid compacting the soil. This can be done by filling the bed gradually.
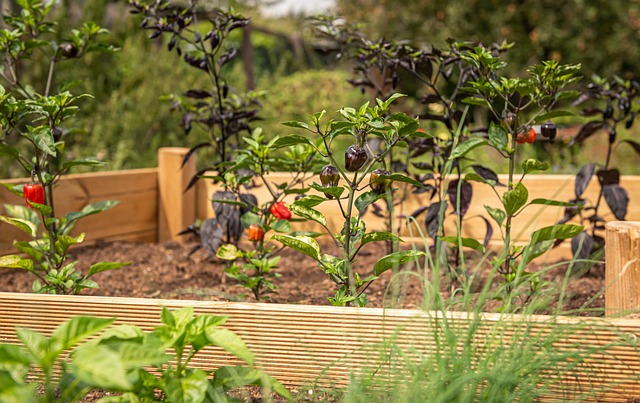
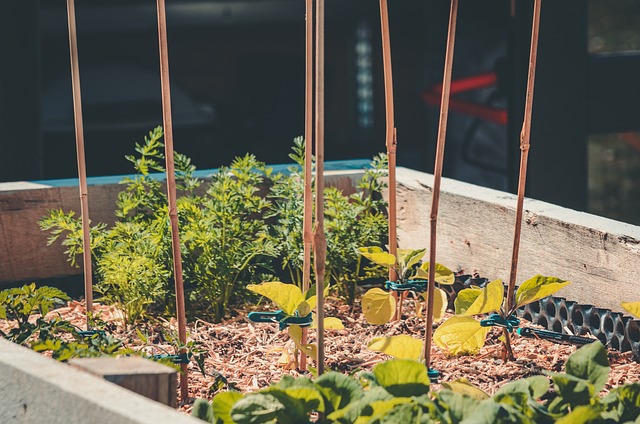
7. Plant Your Garden:
The fun part. Now you’ve built your raised bed, you can move onto the softer side of things.
- Plan Your Planting: Consider the spacing and compatibility of your chosen plants.
- Plant Carefully: Plant your seedlings or transplants according to their specific needs.
- Water Thoroughly: Water your plants deeply after planting.
And there you go. A really simple step-by-step guide to building a raised bed. By following these steps, you can create a beautiful centerpiece for your garden, adding interest and visual aesthetic.
Remember to enjoy the process and the rewards of your gardening efforts.
If you’re looking for inspiration for your raised bed, this article has some great inexpensive ideas to get you started.

Leave a comment